Инсталиране на NGINX
Започваме инсталацията на web сървъра:
$ sudo yum install nginx -y
…
Installed:
nginx.x86_64 1:1.12.2-2.el7
Dependency Installed:
gperftools-libs.x86_64 0:2.6.1-1.el7
nginx-all-modules.noarch 1:1.12.2-2.el7
nginx-filesystem.noarch 1:1.12.2-2.el7
nginx-mod-http-geoip.x86_64 1:1.12.2-2.el7
nginx-mod-http-image-filter.x86_64 1:1.12.2-2.el7
nginx-mod-http-perl.x86_64 1:1.12.2-2.el7
nginx-mod-http-xslt-filter.x86_64 1:1.12.2-2.el7
nginx-mod-mail.x86_64 1:1.12.2-2.el7
nginx-mod-stream.x86_64 1:1.12.2-2.el7
|
Разрешаваме автоматичното стартиране:
$ sudo systemctl start nginx && sudo systemctl enable nginx
Created symlink from /etc/systemd/system/multi-user.target.wants/nginx.service to /usr/lib/systemd/system/nginx.service.
|
Проверяваме дали всичко е наред:
$ sudo systemctl status nginx.service
● nginx.service - The nginx HTTP and reverse proxy server
Loaded: loaded (/usr/lib/systemd/system/nginx.service; enabled; vendor preset: disabled)
Active: active (running) since Sat 2019-04-06 18:27:21 EEST; 1min 12s ago
Main PID: 21559 (nginx)
CGroup: /system.slice/nginx.service
├─21559 nginx: master process /usr/sbin/nginx
├─21560 nginx: worker process
├─21561 nginx: worker process
├─21562 nginx: worker process
└─21563 nginx: worker process
Apr 06 18:27:21 CentOS-server.angies systemd[1]: Starting The nginx HTTP and reverse proxy server...
Apr 06 18:27:21 CentOS-server.angies nginx[21552]: nginx: the configuration file /etc/nginx/nginx.conf syntax is ok
Apr 06 18:27:21 CentOS-server.angies nginx[21552]: nginx: configuration file /etc/nginx/nginx.conf test is successful
Apr 06 18:27:21 CentOS-server.angies systemd[1]: Started The nginx HTTP and reverse proxy server.
Hint: Some lines were ellipsized, use -l to show in full.
|
Задаваме постоянно разрешение на защитната стена да не блокира заявките:
$ sudo firewall-cmd --permanent --add-service=http && sudo firewall-cmd --permanent --add-service=https
Warning: ALREADY_ENABLED: http
success
Warning: ALREADY_ENABLED: https
success
|
В нашия случай такова разрешение вече е било зададено.
Презареждаме защитната стена:
$ sudo firewall-cmd --reload
success
|
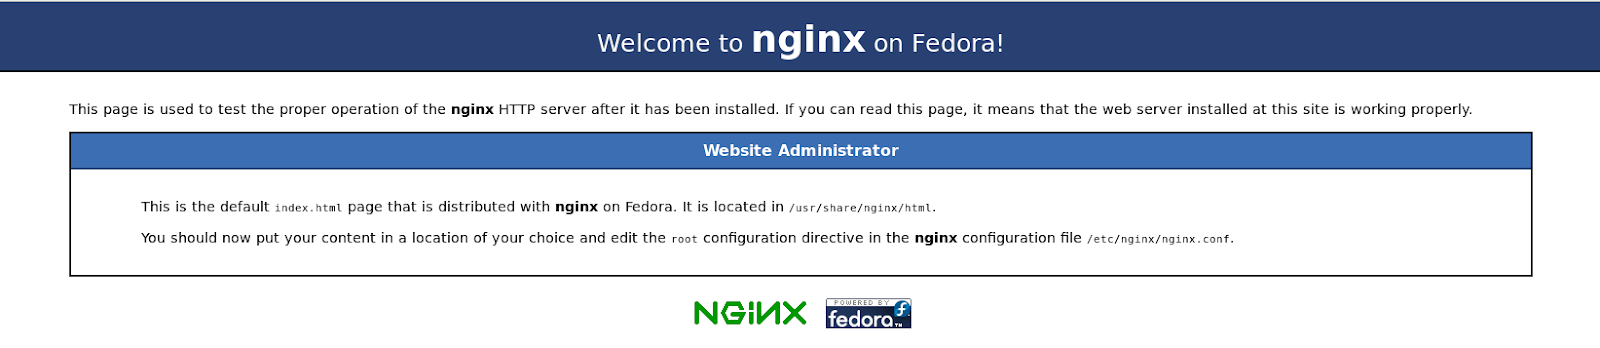
Проверяваме дали всичко е наред, като се свързваме със сървъра. Трябва да видим началния екран:
Продължаваме с настройките. Проверяваме броя на процесорите:
$ sudo cat /proc/cpuinfo | grep -i processor
processor : 0
processor : 1
processor : 2
processor : 3
|
Зареждаме конфигурационния файл:
sudo nano /etc/nginx/nginx.conf
|
и правим следните промени:
става
worker_processes 4;
server {
listen 80 default_server;
listen [::]:80 default_server;
server_name _;
root /usr/share/nginx/html;
|
става
server {
listen 80 default_server;
listen [::]:80 default_server;
server_name angies.eu;
root /usr/share/nginx/html;
location ~ .php$ {
fastcgi_pass 127.0.0.1:9000;
fastcgi_index index.php;
fastcgi_param SCRIPT_FILENAME $document_root$fastcgi_script_name;
include fastcgi_params;
}
|
Тестваме конфигурацията:
$ sudo nginx -t
nginx: the configuration file /etc/nginx/nginx.conf syntax is ok
nginx: configuration file /etc/nginx/nginx.conf test is successful
|
Рестартира сървъра за да си прочете новите настройки:
$ sudo systemctl restart nginx
|
Инсталиране на MariaDB
Започваме инсталацията на втория компонент от стека:
$ sudo yum install mariadb-server mariadb -y
...
Installed:
mariadb.x86_64 1:5.5.60-1.el7_5
mariadb-server.x86_64 1:5.5.60-1.el7_5
Dependency Installed:
perl-Compress-Raw-Bzip2.x86_64 0:2.061-3.el7
perl-Compress-Raw-Zlib.x86_64 1:2.061-4.el7
perl-DBD-MySQL.x86_64 0:4.023-6.el7
perl-DBI.x86_64 0:1.627-4.el7
perl-Data-Dumper.x86_64 0:2.145-3.el7
perl-IO-Compress.noarch 0:2.061-2.el7
perl-Net-Daemon.noarch 0:0.48-5.el7
perl-PlRPC.noarch 0:0.2020-14.el7
|
Стартираме MariaDB и разрешаваме автоматичното ѝ стартиране:
$ sudo systemctl start mariadb && sudo systemctl enable mariadb
Created symlink from /etc/systemd/system/multi-user.target.wants/mariadb.service to /usr/lib/systemd/system/mariadb.service.
|
При инсталацията MariaDB е без администраторска парола, с разрешен анонимен достъп и с дистанционен администраторски достъп до базите. Желателно е да премахнем тези потенциални опасности:
$ sudo mysql_secure_installation
NOTE: RUNNING ALL PARTS OF THIS SCRIPT IS RECOMMENDED FOR ALL MariaDB
SERVERS IN PRODUCTION USE! PLEASE READ EACH STEP CAREFULLY!
In order to log into MariaDB to secure it, we'll need the current
password for the root user. If you've just installed MariaDB, and
you haven't set the root password yet, the password will be blank,
so you should just press enter here.
Enter current password for root (enter for none):
OK, successfully used password, moving on...
Setting the root password ensures that nobody can log into the MariaDB
root user without the proper authorisation.
Set root password? [Y/n] y
New password:
Re-enter new password:
Password updated successfully!
Reloading privilege tables..
... Success!
By default, a MariaDB installation has an anonymous user, allowing anyone
to log into MariaDB without having to have a user account created for
them. This is intended only for testing, and to make the installation
go a bit smoother. You should remove them before moving into a
production environment.
Remove anonymous users? [Y/n] y
... Success!
Normally, root should only be allowed to connect from 'localhost'. This
ensures that someone cannot guess at the root password from the network.
Disallow root login remotely? [Y/n] y
... Success!
By default, MariaDB comes with a database named 'test' that anyone can
access. This is also intended only for testing, and should be removed
before moving into a production environment.
Remove test database and access to it? [Y/n] y
- Dropping test database...
... Success!
- Removing privileges on test database...
... Success!
Reloading the privilege tables will ensure that all changes made so far
will take effect immediately.
Reload privilege tables now? [Y/n] y
... Success!
Cleaning up...
All done! If you've completed all of the above steps, your MariaDB
installation should now be secure.
Thanks for using MariaDB!
|
След като имаме инсталирана и подсигурена база, можем да проверим състоянието ѝ:
$ sudo systemctl status mariadb
[sudo] password for angie:
● mariadb.service - MariaDB database server
Loaded: loaded (/usr/lib/systemd/system/mariadb.service; enabled; vendor preset: disabled)
Active: active (running) since Sat 2019-04-06 19:22:01 EEST; 7min ago
Main PID: 22116 (mysqld_safe)
CGroup: /system.slice/mariadb.service
├─22116 /bin/sh /usr/bin/mysqld_safe --basedir=/usr
└─22277 /usr/libexec/mysqld --basedir=/usr --datadir=/var/lib/mysql --plugin-dir=/usr/lib64/mysql/plugin...
Apr 06 19:21:57 CentOS-server.angies mariadb-prepare-db-dir[22033]: MySQL manual for more instructions.
Apr 06 19:21:57 CentOS-server.angies mariadb-prepare-db-dir[22033]: Please report any problems at http://mariadb....ra
Apr 06 19:21:57 CentOS-server.angies mariadb-prepare-db-dir[22033]: The latest information about MariaDB is avail.../.
Apr 06 19:21:57 CentOS-server.angies mariadb-prepare-db-dir[22033]: You can find additional information about the...t:
Apr 06 19:21:57 CentOS-server.angies mariadb-prepare-db-dir[22033]: http://dev.mysql.com
Apr 06 19:21:57 CentOS-server.angies mariadb-prepare-db-dir[22033]: Consider joining MariaDB's strong and vibrant...y:
Apr 06 19:21:57 CentOS-server.angies mariadb-prepare-db-dir[22033]: https://mariadb.org/get-involved/
Apr 06 19:21:58 CentOS-server.angies mysqld_safe[22116]: 190406 19:21:58 mysqld_safe Logging to '/var/log/maria...og'.
Apr 06 19:21:58 CentOS-server.angies mysqld_safe[22116]: 190406 19:21:58 mysqld_safe Starting mysqld daemon wit...ysql
Apr 06 19:22:01 CentOS-server.angies systemd[1]: Started MariaDB database server.
Hint: Some lines were ellipsized, use -l to show in full.
|
Сега можем да влезем в MariaDB и да видим какви бази имаме:
$ sudo mysql -u root -p
Enter password:
Welcome to the MariaDB monitor. Commands end with ; or \g.
Your MariaDB connection id is 10
Server version: 5.5.60-MariaDB MariaDB Server
Copyright (c) 2000, 2018, Oracle, MariaDB Corporation Ab and others.
Type 'help;' or '\h' for help. Type '\c' to clear the current input statement.
MariaDB [(none)]> show databases;
+--------------------+
| Database |
+--------------------+
| information_schema |
| mysql |
| performance_schema |
+--------------------+
3 rows in set (0.00 sec)
MariaDB [(none)]> Bye
|
Инсталиране на PHP
В инсталацията на PHP трябва да включим и php-fpm („fastCGI process manager“) и да настроим Nginx да прехвърля PHP заявките към тази програма за обработка. Тя е необходима, тъй като за разлика от други сървъри Nginx не поддържа PHP по подразбиране.
Започваме инсталацията на третия компонент с:
$ sudo yum install php php-common php-fpm php-mysql -y
...
Installed:
php.x86_64 0:5.4.16-46.el7
php-common.x86_64 0:5.4.16-46.el7
php-fpm.x86_64 0:5.4.16-46.el7
php-mysql.x86_64 0:5.4.16-46.el7
Dependency Installed:
apr.x86_64 0:1.4.8-3.el7_4.1
apr-util.x86_64 0:1.5.2-6.el7
httpd.x86_64 0:2.4.6-88.el7.centos
httpd-tools.x86_64 0:2.4.6-88.el7.centos
libzip.x86_64 0:0.10.1-8.el7
mailcap.noarch 0:2.1.41-2.el7
php-cli.x86_64 0:5.4.16-46.el7
php-pdo.x86_64 0:5.4.16-46.el7
Complete!
|
Стартираме и проверяваме автоматичното стартиране:
$ sudo systemctl start php-fpm && sudo systemctl enable php-fpm
Created symlink from /etc/systemd/system/multi-user.target.wants/php-fpm.service to /usr/lib/systemd/system/php-fpm.service.
|
Извършваме проверка на състоянието:
$ sudo systemctl status php-fpm
● php-fpm.service - The PHP FastCGI Process Manager
Loaded: loaded (/usr/lib/systemd/system/php-fpm.service; enabled; vendor preset: disabled)
Active: active (running) since Sat 2019-04-06 19:42:08 EEST; 4min 4s ago
Main PID: 26113 (php-fpm)
Status: "Processes active: 0, idle: 5, Requests: 0, slow: 0, Traffic: 0req/sec"
CGroup: /system.slice/php-fpm.service
├─26113 php-fpm: master process (/etc/php-fpm.conf)
├─26135 php-fpm: pool www
├─26136 php-fpm: pool www
├─26137 php-fpm: pool www
├─26138 php-fpm: pool www
└─26139 php-fpm: pool www
Apr 06 19:42:08 CentOS-server.angies systemd[1]: Starting The PHP FastCGI Process Manager...
Apr 06 19:42:08 CentOS-server.angies systemd[1]: Started The PHP FastCGI Process Manager.
|
Сега трябва да настроим PHP:
Откоментираме и променяме
на
Това ще попречи на Nginx да изпълнява файлове, които не са PHP като такива и не отговарят изрично на зададения адрес. След записа продължаваме с настройките:
$ sudo nano /etc/php-fpm.d/www.conf
|
Откоментираме и променяме:
;listen.owner = nobody
;listen.group = nobody
;listen.mode = 0666
; Unix user/group of processes
; Note: The user is mandatory. If the group is not set, the default user's group
; will be used.
; RPM: apache Choosed to be able to access some dir as httpd
user = apache
; RPM: Keep a group allowed to write in log dir.
group = apache
|
на
listen.owner = nobody
listen.group = nobody
;listen.mode = 0666
; Unix user/group of processes
; Note: The user is mandatory. If the group is not set, the default user's group
; will be used.
; RPM: apache Choosed to be able to access some dir as httpd
user = ngnix
; RPM: Keep a group allowed to write in log dir.
group = ngnix
|
След промените и съхранението рестартираме сервиза:
$ sudo systemctl restart php-fpm
|
Nginx търси по подразбиране файловете в /usr/share/nginx/html/. Ще запишем там тестова страница:
$ sudo nano /usr/share/nginx/html/phpinfo.php
|
със следния елементарен код:
<?php
// Show all information, defaults to INFO_ALL
phpinfo();
?>
|
Последен рестарт на сървъра:
$ sudo systemctl restart nginx
|
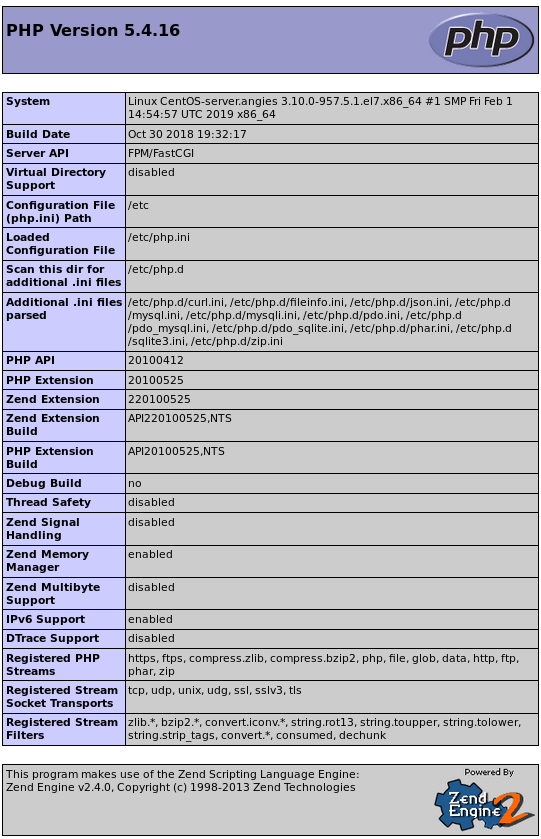
Сега вече можем да пробваме нашата инсталация, като изберем адрес в браузера [вашият-домейн-или-ip-адрес]/phpinfo.php и трябва да получим:
Успех!
Източници:
Коментари
Публикуване на коментар